ブログエンジン(4) Maven+Jetty+Seleniumで総合テスト
テストのないコードはレガシーコードである
孔子様の有名な言葉ですね。弟子によく言っていたそうです嘘ですこの本です。
機能追加やライブラリ入れ替え、リファクタリングが気軽にできるよう、なるべくテストコードを書くようにしています。このエントリでは、blog-java1で行っている自動テストを紹介します。
方針
blog-java1を作るに当たって、以下の方針を立てました。
- モジュール単位の単体試験はJUnitで行う
- ControllerやJSP、Javascriptの試験は、統合テストとしてSeleniumで行う
- JaCoCoでテストカバレッジを計測する
- PhantomJSを使い、CUI環境でも統合テストが実施できるようにする
- 全てをMavenで実行できるようにする
カバレッジ計測とテストレポートの作成でハマりましたが、なんとか実現できました。
単体テスト
単体テストは普通のJUnit4テストです。
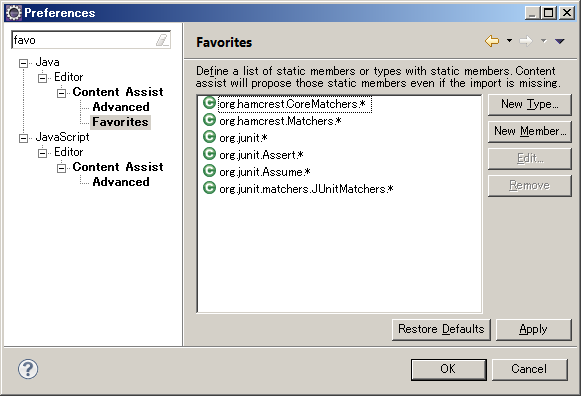
eclipseのコンテンツアシストに以下の設定を入れました。hamcrestはアレですけど、org.junit.Assert.*あたりはデフォルトで入れて欲しいですよね。
SpringやDB周りのテストケースは、SpringTestBaseを継承しています。@Autowiredが効きますし、executeSqlでお手軽にデータ投入できて良い感じです。
@RunWith(SpringJUnit4ClassRunner.class)
@WebAppConfiguration
@ContextConfiguration(locations = {
  "file:src/main/webapp/WEB-INF/applicationContext.xml",
  "file:src/main/webapp/WEB-INF/applicationContext-db.xml",
  "file:src/main/webapp/WEB-INF/applicationContext-security.xml",
  "classpath:/applicationContext-testdb.xml" })
public abstract class SpringTestBase {

  @Autowired
  private ApplicationContext ctx;

  @Autowired
  protected DataSource dataSource;

  protected void executeSql(String path) {
    EncodedResource resource = new EncodedResource(ctx.getResource(path), "UTF-8");
    JdbcTemplate template = new JdbcTemplate(dataSource);
    JdbcTestUtils.executeSqlScript(template, resource, true);
  }
}
統合テスト
まず、Jettyを起動しないと始まりません。この辺を参考に、pom.xmlを書きました。
<plugin>
  <groupId>org.eclipse.jetty</groupId>
  <artifactId>jetty-maven-plugin</artifactId>
  <version>9.1.0.v20131115</version>
  <executions>
    <execution>
      <id>start-jetty</id>
      <phase>pre-integration-test</phase>
      <goals>
        <goal>stop</goal>
        <goal>start</goal>
      </goals>
      <configuration>
        <systemProperties>
          <force>true</force>
          <systemProperty>
            <name>jetty.port</name>
            <value>${selenium.jettyport}</value>
          </systemProperty>
        </systemProperties>
        <reload>manual</reload>
        <scanIntervalSeconds>0</scanIntervalSeconds>
        <daemon>true</daemon>
      </configuration>
    </execution>
    <execution>
      <id>stop-jetty</id>
      <phase>post-integration-test</phase>
      <goals>
        <goal>stop</goal>
      </goals>
    </execution>
  </executions>
  <configuration>
    <systemPropertiesFile>src/filters/${pom.confdir}/config.properties</systemPropertiesFile>
    <reload>automatic</reload>
    <scanIntervalSeconds>1</scanIntervalSeconds>
    <webApp>
      <contextPath>/${pom.contextPath}</contextPath>
    </webApp>
    <stopKey>key1</stopKey>
    <stopPort>9999</stopPort>
    <stopWait>10</stopWait>
  </configuration>
</plugin>
integration-testの前にJettyがstop→startして、integration-testの後にstopできるようになります。
maven-failsafe-pluginのintegration-testは、デフォルトでIT*.java *IT.java *ITCase.javaが統合テストのターゲットになります。blog-java1では、Selenium01_IT.javaとSelenium02_IT.javaとしました。
テストメソッドを順序通りに実行して欲しいので、@FixMethodOrder(MethodSorters.NAME_ASCENDING)を付けました。
また、WebDriver関連のおまじないはSeleniumTestBaseに押し込んであります。
Selenium実行時の画面キャプチャです。特に面白い所はありませんけれども。

